
Need more dice, character inspiration, or gear for your next campaign? Visit Runic Dice for fantasy-themed dice sets, accessories, and more tools to bring your game to life—on the table and beyond.
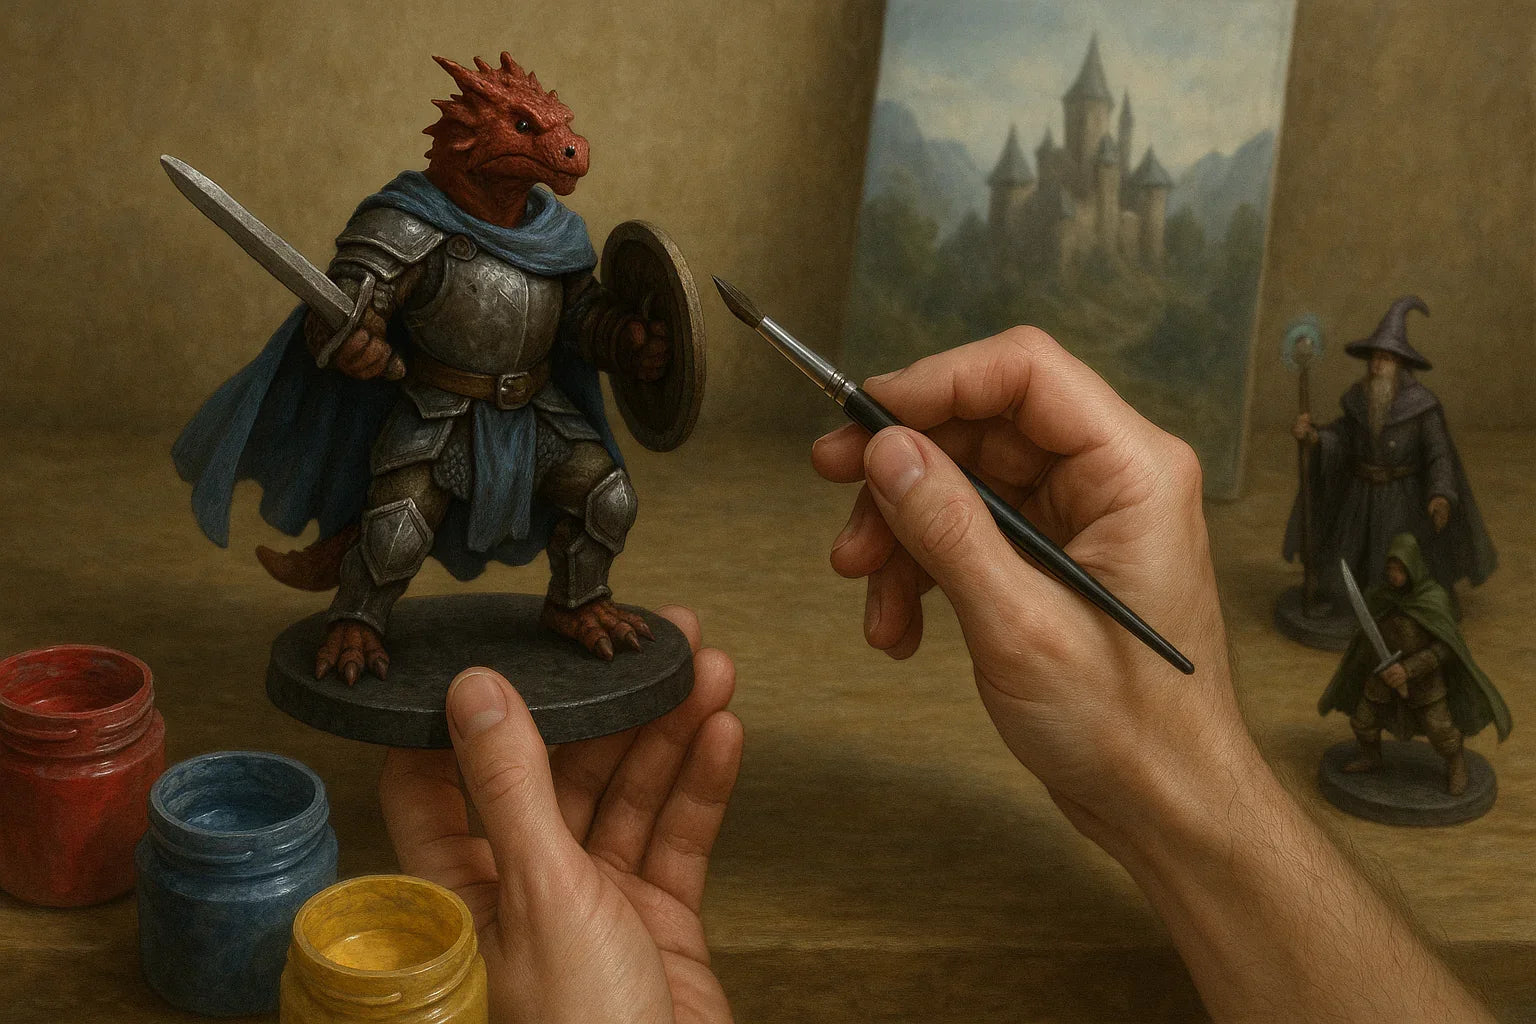
How to Paint DnD Miniatures: An Easy Guide for Beginners

Updated on: March 31, 2026
Painting Dungeons & Dragons miniatures is one of the most fun and creative parts of tabletop gaming. It is more than just coloring a piece of plastic. It is a chance to bring your characters and monsters to life, add personality to your campaign, and make each session feel more real.
Whether you're brand new to the hobby or just looking for a better starting point, this guide will walk you through the basics. By the end, you will know exactly what you need to begin and how to take your first steps into the world of miniature painting.
Why Paint DnD Miniatures?
You might be wondering if it is really worth the time to paint your figures. After all, you can play with them right out of the box. The truth is, once you paint a miniature, it becomes more than just a game piece. It becomes your character or your creature. It reflects your vision of that rogue, wizard, or dragon. That kind of connection makes the whole game feel more immersive and personal.
Painting is also a relaxing, creative hobby. It gives you a break from screens and lets you focus on something hands-on. There is a unique kind of satisfaction that comes from finishing a figure and seeing it on the table during your next game. Plus, painting is a great way to express your style and tell visual stories through your models.
Basic Supplies You Need to Start Painting
You do not need to break the bank to get started. Many beginner painters think they need a huge collection of paints and tools, but you really only need a few essentials to begin. Here’s what you should have:
1. MINIATURES
Start with a figure that you are excited about. It could be your DnD character, a villain from your campaign, or even a random goblin you like the look of. Official Dungeons & Dragons minis are great, but you can also use models from other fantasy games or third-party sources.
2. ACRYLIC PAINTS
Make sure to use paints designed for miniatures. These paints have finer pigments and smoother finishes. Brands like Citadel, Vallejo, Army Painter, and Reaper are popular for a reason. You only need a few colors to begin. Choose a skin tone, a metal color like silver or bronze, a few earthy colors for clothing or armor, and maybe one or two bold colors for things like cloaks or magic effects.
3. PAINT BRUSHES
A few good brushes go a long way. For most details, a size 0 or size 1 brush works well. Get a slightly larger brush for base coating and priming. You do not need to spend a lot on brushes, but try to avoid very cheap ones that lose bristles quickly.
4. PRIMER
Primer helps the paint stick better to your miniature and shows off the detail of the sculpt. You can buy spray-on primer or use a brush-on version. Choose black, white, or gray depending on the kind of look you want. Black is more forgiving if you miss a spot, while white makes bright colors pop more.
5. WATER CUP AND PALETTE
You will need a cup of water to rinse your brush and thin your paint. A palette, even a simple plastic plate or a piece of foil, helps you mix colors and control how much paint you use.
6. PAPER TOWELS
Use these for wiping excess water off your brush, cleaning up spills, or blotting dry before dry brushing.
7. GOOD LIGHTING
Painting tiny details is much easier when you can actually see them. A bright desk lamp or natural daylight is ideal. Some painters even use magnifying lamps, but that is not necessary for beginners.
If you can find a beginner paint set that includes brushes, paints, and a figure, it is a great way to try everything out at once without a big investment.
Prepping Your Miniatures
Before you start painting, take a few minutes to get your miniature ready. This step can make a big difference in how your final result turns out.
First, check for mold lines or bits of extra plastic left over from the molding process. You can scrape these off gently with a hobby knife or file. They are usually found along arms, weapons, or the base.
Next, wash your miniature in warm, soapy water. This removes any dust, oils, or mold release agents that might keep paint from sticking. Let the figure dry completely.
Now it’s time to prime. Hold the miniature a few inches away from your spray can and apply a thin, even coat. If you are using brush-on primer, apply it gently so you do not fill in any of the details.
Step-by-Step Guide to Painting Your Miniature
Painting might seem intimidating, but if you take it one step at a time, it becomes a very approachable and enjoyable process.
1. BASE COATING
Start by painting the main colors of your miniature. This is called base coating. Use thin layers of paint and try not to let it pool in the details. If you can still see the primer after one coat, that is okay. Just let it dry and add another thin layer.
2. SHADING
Shading adds depth and makes your figure look more three-dimensional. One easy way to shade is by using a wash. A wash is a thin, dark paint that flows into cracks and crevices. Apply it over your base coat and let it settle. It will instantly make your mini look more detailed.
3. HIGHLIGHTING
After shading, you can highlight the raised areas. Use a lighter version of your base color and carefully paint the edges and tops of shapes like armor plates, folds of cloth, or muscles. You can also use a technique called dry brushing, where you wipe almost all the paint off your brush and gently drag it across the surface. This catches only the raised areas and gives a natural highlight.
4. DETAILS
Now pick out the small features like eyes, belt buckles, weapons, or magical runes. Use a small brush and go slowly. Don’t be afraid to clean up any mistakes with your base color.
5. SEALING
Once your miniature is fully painted and dry, apply a clear varnish to protect your work. Matte varnish gives a more natural look, while gloss can make things like armor or monsters appear shinier. Spray sealers are quick, but brush-on versions give more control.
Helpful Tips for Beginners
- Thin your paints with a drop or two of water. This keeps your layers smooth and prevents clumps.
- Work in small areas and let each part dry before moving on. Rushing can lead to smudges or muddy colors.
- Start simple. It is better to have a clean paint job with a few colors than a messy one with too many.
- Keep your space organized. A clean workspace makes painting more enjoyable.
- Practice on test models before you paint your favorite character. This takes the pressure off.
And most importantly, have fun. Nobody paints a perfect mini on their first try. The goal is to improve with each one.
Going Beyond the Basics
As you get more comfortable, you might want to explore advanced techniques like glazing, layering, and wet blending. These methods let you create smoother transitions and more dramatic effects. There are lots of great tutorials online that break these techniques down step by step.
You can also experiment with basing your miniatures by adding sand, grass, or rocks to the base. This gives them even more personality and helps set the scene for your campaign.
How to Protect and Store Your Miniatures
After spending time and effort on your miniatures, it is important to take care of them. Store them in foam-lined cases or padded boxes to avoid scratches. Try to handle them by the base when moving them around during a game. If the varnish starts to wear off, you can always add a fresh layer to keep them looking their best.
Ready to Get Started?
Painting DnD miniatures is a rewarding and creative hobby that brings your tabletop world to life. With a few basic tools, some patience, and a little practice, anyone can learn to paint. Don’t worry about being perfect. Focus on having fun, improving over time, and making your characters look like the heroes (or villains) they are meant to be. So grab a brush, pick your favorite mini, and start your painting journey today.


Leave a comment
This site is protected by hCaptcha and the hCaptcha Privacy Policy and Terms of Service apply.